Winter Home Improvement Projects You Should Start Now

Great winter projects you can start today!

Home improvement projects can be a great way to improve your home and make it more comfortable and functional for the winter.

In this article, we’ll discuss some of the most popular home improvement projects that can be done during the winter season.

Insulation

One of the most popular home improvement projects during the winter is insulation.

Insulation can help keep your home warm in the winter and cool in the summer, making it more comfortable to live in year-round.

There are a number of different types of insulation, so you’ll need to choose one that is best suited for your home.

Types of insulation:

  • Fiberglass insulation

Fiberglass insulation is one of the most popular types of insulation, and it comes in a variety of different forms.

Fiberglass insulation is made up of tiny glass fibers that are suspended in a resin.

This type of insulation is known for its ability to resist heat transfer, making it a good choice for homes in colder climates.

It is also moisture-resistant, which makes it a good choice for homes in humid climates.

  • Cellulose insulation

Cellulose insulation is made from recycled materials, such as newspaper, and it is a popular choice for homes in colder climates.

This type of insulation is effective at resisting heat transfer, and it is also moisture-resistant.

One downside to cellulose insulation is that it can be a fire hazard if it is not installed correctly.

Another downside to this type of insulation is that it can be expensive.

  • Polyurethane foam insulation

Polyurethane foam insulation is made from plastic and it is one of the most effective types of insulation.

This type of insulation is resistant to moisture and pests, and it can also help reduce noise levels in your home.

However, polyurethane foam insulation is an expensive type of insulation and it can make your home more difficult to heat.

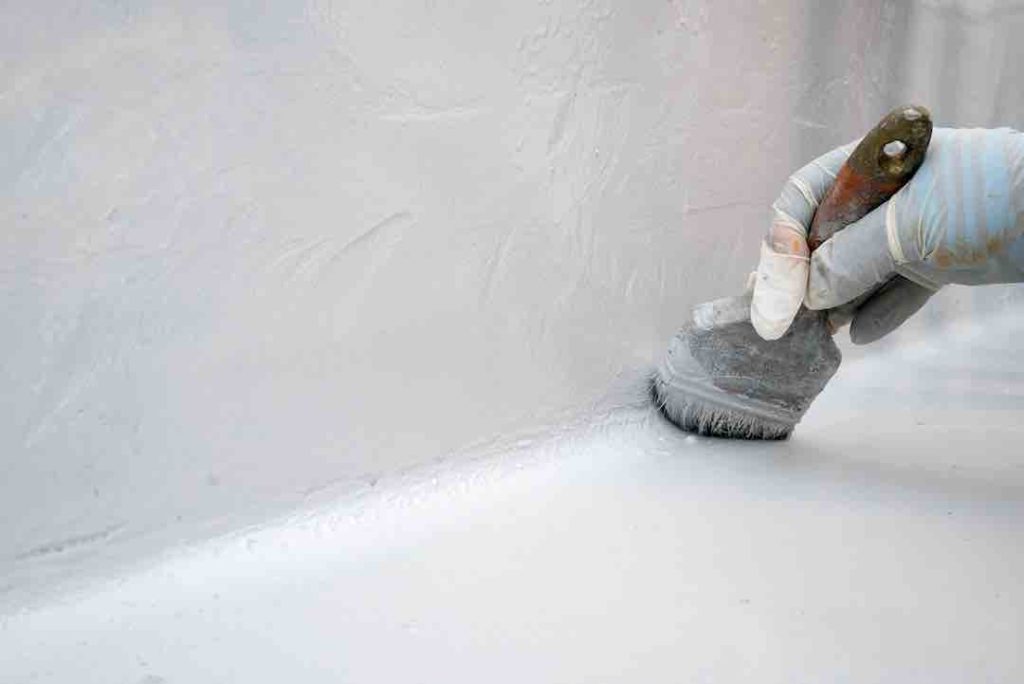
  • Spray foam insulation

This type of insulation is made from a closed-cell foam that is spray-applied into a wall, floor, or roof cavity.

The spray creates a thick layer on the interior of these spaces, which helps prevent air infiltration and makes it easier for your heating system to do its job.

One downside to this type of insulation is that it can be expensive, as well as difficult to install correctly.

Window Replacement

Another popular home improvement project for the winter is window replacement.

Windows that are drafty or cracked can let in a lot of cold air during the winter, which can make your heating system work much harder to keep the interior of your home warm.

In most cases, replacing old windows with double-paned windows or triple-paned windows will reduce the number of drafts in your home, which will save you money on energy costs.

You’ll also need to choose a window that is good for keeping out heat during the summer, as well as reducing noise levels.

Garage Door Replacement

If you spend a lot of time in your garage, then it is worth taking the time to replace your garage door with a new one that is energy-efficient.

On average, about 50% of heat loss happens through the garage door, so replacing an old or drafty door with a new insulated one can make your home more comfortable and more affordable for heating.

Sealing Air Leaks

Another popular home improvement project during the winter season is sealing air leaks around doors and windows.

Air leaks increase drafts in your home, which makes it harder for your heating system to keep warm air inside.  

This means that you’ll have to use more energy when you’re trying to stay warm in your home, which can increase your energy bill.

You’ll also notice that you’re colder because cold air is leaking into your home.

One way to detect these leaks is by noticing where cold air is coming in through the cracks around windows and doors.

Once you’ve located them, you can seal them with caulk or weather stripping so they don’t leak anymore.

Exhaust fans

If you have an exhaust fan that is not properly sealed or working properly, then cold air can seep into your home through the fan.

One way to fix this problem is by sealing the area around the fan with caulk.

You should also make sure that your heating system isn’t circulating air from your kitchen or bathroom back into other rooms in your house, which will help reduce drafts and costs on your energy bill.

HVAC Repair

No matter how much money you spend on energy-efficient appliances and insulation, the efficiency of your HVAC system affects energy usage more than anything else.

The first step to improving the efficiency of your HV system is scheduling annual maintenance.

During annual maintenance, a technician will check the performance of all components in your HVAC system and clean or replace parts as needed.

This service can increase the efficiency of your HVAC system, which will save you money on energy bills.

Also, if you have older HVAC equipment that is not geothermal-ready then it might be time to consider replacing the equipment with a new unit that is more affordable to heat and cool.

There are many ways that you can improve the efficiency of your HVAC system without spending too much extra cash.

Replacing bulbs with LED light bulbs

In addition to being one of the most energy-efficient types of lighting available, LED light bulbs also last longer than other types of lighting, which makes them worth the extra cost.

LED light bulbs are also available in a variety of different colors, so you don’t have to settle for the yellow hue that is common with fluorescent lights.

Fan or ceiling fan installation

Ceiling fans can circulate air throughout your home, which keeps it fresh and helps reduce drafts.

If your ceiling fan isn’t working properly or is old and outdated, then you should consider having it replaced with a new one.

Installing an Energy-Star ceiling fan will help reduce energy usage by making sure that your heating system doesn’t have to work as hard at keeping warm air circulating through your home.

If you have a portable fan, then you should consider purchasing an energy-efficient model.

The small cost to purchase an energy-efficient fan with replaceable batteries will save you so much in operating cost over time that it’s worth spending more upfront on the initial investment.

Smart thermostat installation

The price of installing a smart thermostat is typically more than offset by the cost savings that you will see on your monthly energy bills.

These types of thermostats use built-in WiFi to help control temperatures in your home according to programmed schedules, which helps you save money on heating and cooling costs.

Energy-efficient appliances

A washing machine or dishwasher with Energy Star certification uses less water and power than standard models. You could also upgrade an older model to one that has Energy Star features if it needs repairs or replacement.

Also, consider upgrading any lighting in appliance interiors with LED bulbs, as these lights will last longer and help reduce energy usage from running the appliance’s built-in lights.

Final Thoughts

Winter is a great time to take on home improvement projects that will help you save money on your energy bill.

We’ve provided a list of some winter home improvement projects that you should start now.

Some of these projects, such as caulking or weather-stripping windows and doors, are easy and don’t require any special skills or tools.

Others, such as repairing or replacing your HVAC system, might require the help of a professional.

However, all of these projects can help reduce the amount of energy that your home consumes and save you money in the long run.

Which project are you going to start first?…

10 Home Improvement Projects That Won’t Make You Sweat

We all know the feeling of dread when we see a pile of work to be done.

Whether you’re moving into a new house or just want to freshen up your current space, home improvement projects can be daunting and time-consuming.

But there’s no need for them to be!

With these helpful tips and tricks, you’ll soon enjoy the fruits of your labor rather than fretting over it.

So get ready to transform your home with some quick fixes that will have long-lasting effects on how much you enjoy living in it.

Let’s get started!

1. Paint your front door a bright color.

A bright, freshly painted front door will make your neighbors feel welcome when they visit.

A fresh coat of paint can help your home’s curb appeal, increase its value, and just brighten up your day when you come home to see it!

The best part?

It doesn’t require a professional painter, special skills, or special equipment.

Just get your supplies at the nearest home improvement store and start painting!

In just a few brief hours, you’ll have transformed your front door for the better.

Here’s how to paint your front door:

  • First, find a color that complements your home’s exterior.
  • Remove the secondary door if you have one.
  • Next, paint both sides of the door with high-quality latex or acrylic paint.
  • Allow the paint to dry for eight hours.
  • Do a second coat of paint, if desired.
  • Finally, spray a clear topcoat onto the door to protect the fresh paint.
  • Painting your front door a bright color is an easy way to improve your home’s curb appeal without breaking too much of a sweat.

The steps are simple, so don’t be intimidated. Instead, try it and surprise yourself.

2. Create custom artwork for your walls.

Use sponges to create interesting shapes on the wall with watered-down paint. You can paint anything from flowers and leaves to geometric shapes.

If you don’t want to mess up the walls in your home when creating artwork, create the shapes on a piece of paper and tape them to your wall.

Here are the steps for creating custom artwork for your walls:

  • Pour 1/2 cup of water into a small bowl.
  • Dilute 1 or 2 tablespoons of acrylic paint in the water until it becomes translucent.
  • Squeeze out excess liquid from 1 sheet of sponge, then dip the sponge into your diluted paint mixture until it is complete.
  • Starting at an edge, press down hard on the surface with the sponge. This will create an imprint on the other side.
  • Keep pressing around different areas of your home’s entryway or interior walls to make various leaf and flower shapes.
  • Allow the paint to dry for eight hours, then remove your artwork from the wall.

A good tip for creating custom artwork on your walls is to be sure to protect your floor and furniture.

Cover the floors and other areas around your walls with an old sheet or tarp to avoid any staining or messes.

3. Organize small items with a magnetic strip.

Use a magnetic strip to corral all those loose keys and random bits of hardware that gather near entryway or interior doors.

Here’s how:

  • Attach a 9-by-21/2 inch rectangle magnet to each side of a 5-inch square sheet of steel flashing using an adhesive spray or epoxy glue.
  • Cut out four pieces of 1×1 inch wood molding at least 2 inches long.
  • Drill two holes in each piece of wood molding, one near the top and one at the bottom.
  • Screw two small hooks into one side of your entryway or interior door frame to hang your newly created magnetic key rack.
  • Hang your keys from the key hook!

Keeping your keys and hardware organized allows for quick access to everything you need, which is incredibly convenient when you’re in a rush.

4. Clean off your entryway with a walk-off mat.

A high-traffic area like an entryway can get dirty quickly, especially if you have pets or live in a hard-water area where water gets tracked into your home.

As soon as you step onto this welcome mat, dirt, soil, and even excess water are immediately whisked away before it has time to contact any inside your home.

Here’s how to create a walk-off mat:

  • Measure the width and length of your entryway.
  • Next, cut two pieces of heavy-duty vinyl that are at least 3 inches longer than your measurements with a utility knife.
  • Use masking tape to hold the edges together, then staple the mat along all four sides.
  • If you need additional traction underfoot, place rubber rug grippers beneath the mat.

5. Replace hardware on cabinets and doors.

By replacing the hardware on your cabinets and doors, you’ll give your kitchen makeover a whole new look without having to use an ounce of paint.

Add a pop of color by replacing the current knob with one in your favorite shade.

Here’s how to replace hardware on cabinets and doors:

  • Remove the door from its hinges.
  • Take out the screws from the existing hardware using a Phillips head screwdriver.
  • Keep the removed pieces together in a container or envelope, so they don’t get lost.
  • Attach your new hardware to the surface where the old hardware once was using a power drill and screws for your specific type of cabinet or door.
  • Fix the door back onto its hinges, and you’re done!

6. Replace light bulbs with LED lights

Regular light bulbs are only 60% efficient, meaning that 40% of the energy they use is wasted in heat.

Conversely, LED lights are 90%-95% efficient because they convert most of their energy into light rather than heat.

Here’s how to replace your regular light bulbs with LED lights:

  • Locate your home’s circuit breaker box to turn off the electricity before starting any electrical work.
  • Remove the current bulb by turning counterclockwise, then place it in an envelope or container for safekeeping if you’re not ready to dispose of it yet.
  • Secure your new LED light bulb into a place where your old light bulb once was.
  • Switch the circuit breaker back on.

Tip: Dispose of your old lightbulbs in an eco-friendly way by dropping them off at a recycling center or community collection facility.

7. Install a new mailbox that matches your home’s exterior design.

Your mailbox is the first thing your neighbors, family members, and guests see when they approach your home.

You can purchase a new mailbox online or at the local hardware store and install it yourself.

Here’s how to replace your mailbox:

  • Check with your homeowner’s association to see if any rules govern the style of mailbox you install.
  • Purchase a new color-coordinated mailbox that matches your exterior home design online or at your local hardware store.
  • Use a screwdriver to remove all screws securing the mailbox into its post.
  • Install your new mailbox into this same spot using the screws provided with the new box.
  • Be sure to recycle your old mailbox or donate it to charity.

8. Add an attractive outdoor rug.

An outdoor rug will add a pop of color to your entryway, porch, or patio while also helping you avoid tracking in grass cuttings or soil from outside.

Outdoor rugs are typically made of polypropylene, which is weatherproof and easily hosed down to clean.

Here’s how to add an outdoor rug:

  • Locate the area where you want to place your new rug.
  • Remove any loose or protruding rocks to ensure a smooth surface of your rug.
  • Unroll your outdoor rug onto the ground in this exact spot, then use a garden hose with a sprayer to wet the entire surface, so the rug lies flat on the ground.
  • Allow it to dry completely before walking on it or placing any furniture on it.

9. Get rid of clutter.

Clutter makes your rooms feel smaller and gives the appearance that you don’t care about your home’s architecture or design.

By organizing your belongings into baskets, drawers, or shelves, you’ll add much-needed storage space to any room in your home.

Here’s how to get rid of clutter:

  • Locate any cabinets, closets, or bookshelves in a room where you wish to reduce clutter and begin exploring ways you can use these spaces for added storage.
  • Use baskets to store children’s toys, shoes, miscellaneous items on surfaces such as countertops and tables.
  • Evaluate which items are important enough to keep, and which ones can be donated or discarded.
  • Dispose of old magazines, books, newspapers, and expired food items.

10. Clean your air conditioner’s air filter.

A dirty air conditioner will run less efficiently and could even cause damage to your HVAC system by overheating.

But a dirty filter is a problem easily solved with this simple home improvement project.

Here’s how to clean the air conditioner filter:

  • First, turn off your HVAC system at the thermostat.
  • Locate your air conditioning unit outside, then pull out the removable filter and use a vacuum cleaner with an

10 Most Common Blunders DIYers Make

You can easily avoid these common blunders

In a time of economic downturn, DIYers are trying to do everything possible to save money. This is admirable but some can be dangerous when it comes to home repairs. Almost one in five homeowners in the US have had at least one unanticipated home repair job costing them over $1,000 in the past five years.

In a survey, 28% of homeowners who have had to shell out over $1k on unexpected repairs did the home repair themselves. But while DIY is great for small jobs like changing light bulbs and painting a room, it’s really intended for things that are so simple even a child can do them. It’s not intended to be used for things like replumbing an entire house or wiring up a new power box.

Another 20% of people surveyed said their problems stemmed from using inadequate materials or products. So before you start working on your home improvement project, make sure you’re buying high-quality building supplies and materials. If in doubt whether something will pass muster, hire a professional to do the job – you’ll save yourself time and money in the long run.

Here are the most common blunders that new DIYers make. Of course, there are many more to consider but these are some of the most common ones that can leave you with a hefty bill in the end.

1) Trying to fix plumbing problems without experiencing plumbing training:

If you don’t know what you’re doing, it’s best just to call a professional.

The problem is, you may be tempted to try “fixing” things yourself because it seems easy and straightforward. But plumbing work can be very dangerous if you don’t know what you’re doing. You could cause a flood or even start a fire!

Plus, repairing plumbing problems incorrectly can result in extensive water damage that will cost you thousands to repair. So if you’re not sure about what’s wrong with your plumbing or how to fix it, call a plumber!

2) Trying to fix electrical problems without getting proper training:

If you’re not familiar with electric circuits and how electricity works, don’t try to fix it yourself. You could end up electrocuting yourself, or start a fire in your home.

If you are not sure what is wrong with an electrical component, just call a professional electrician. It’s worth the money and if they do something you didn’t authorize (which does happen) you’re covered because the work will be done under their license and insurance.

3) Trying to fix a garage door yourself:

Garage doors are very complex and they are connected to all the other moving parts of your home, security-wise and with regards to heating.

In addition, they’re extremely heavy.

There’s generally no need for a homeowner who is not an expert in this field to try and repair their garage door.

4) Trying to do your roof repairs on your own:

The roof of a home is its most vulnerable part. It’s important for all homeowners to be aware that many shingles and old roofs are extremely dangerous, especially when they’re not attached properly or have sharp points sticking out from them which can puncture things in the house like lawn chairs or even pets!

Also, roofs can get damaged due to wind, high temperatures, and other weather conditions. If you do notice cracks forming in your roof it is best to call an expert who will ascertain the seriousness of any damages. Even small cracks can quickly turn out to be huge problems that could cost you a lot of money to fix in the end.

5) Failing to repair a broken appliance:

If there’s something wrong with one of your appliances (washing machine or dryer) and you don’t get it fixed, it will only cost you more money in the future.

You may not notice the deterioration of your appliance at first but over time things will start to wear out which can cause some very serious damage. Pay attention to your appliances and get them repaired as soon as you notice they’re not working properly.

6) Painting your own home:

Painting isn’t as easy as most homeowners think it is. There’s a lot that goes into painting a home properly if you want to avoid any problems down the road with peeling paint or just a mess that needs redoing.

Most people can’t paint their homes properly. Paint is an art and not everyone can do it without running into problems with it peeling or just a mess that needs redoing.

Not everyone has the time it takes to do a proper painting job, either. A few hours of work is not enough to paint the outside of your home properly.

If you’re thinking about paying for someone to paint your home, always remember that hiring an inexperienced painter (like a friend or relative) can cause more problems than it solves (i.e. they mess up and don’t fix it or they charge you too much money).

7) Not repairing an old pipe:

There are many types of pipes used by homes for various applications including hot water, heating, gas, and sewage systems and sometimes they need to be repaired (especially older ones).

Old pipes are more likely to leak and cause problems in your home. If you notice any signs of water leaks or if the pipe is broken, have it repaired immediately!

For example, if you notice that there is a water leak on the ground or that the pipe is broken then have it repaired as soon as possible. Remember that when the old pipes are leaking they also pose risks to you and anyone else who might be in the house.

In addition, one broken pipe can lead to others being damaged as well which is why you should have all your old pipes tested and repaired if necessary.

8) Cleaning your chimney by yourself:

If we are talking about a fireplace or wood-burning stove that is not connected to the rest of the house’s heating system, then there might be some risks in doing it yourself.

If you’re not familiar with the parts of a chimney, there is the top and down which make up the chimney. The bottom half is called the stack. The vertical portion of this segment is known as a flue, chimney, or simply shaft. There are many different types of materials that can be used to clean out a chimney including brushes, rods, and rods. Some people prefer to use natural products because they are less dangerous than chemicals which can cause health problems for you when exposed to them for long periods of time.

There are many reasons why you may need to clean out your chimney but the most important one is that you want to prevent fire hazards or carbon monoxide poisoning. One of the main issues with cleaning out a chimney by yourself is that if you don’t do it properly then there could be some serious negative effects (i.e. things like getting caught in the flue or falling down while inside).

9) Making holes in walls before knowing where everything lines up:

Keep paper over the area where you want to put something, mark out all your measurements, then make a hole once everything has been lined up properly.

There are many possible problems that can happen when you start making holes in a wall before you know where everything lines up. For example, if you’re going to make a hole for an appliance like the dishwasher or refrigerator, you need to be sure that it’s not going to go through any pipes or wires which can lead to some serious problems down the road.

10) Investing too much when starting out:

There is an issue that I have noticed when starting out with home improvement projects. People often invest too much money into something when they are not sure that they can handle it properly. This can lead to many problems and will not be covered by warranties which means you will have to pay for them on your own.

As an example, if your goal is to build a patio area then maybe go for building a small one first (e.g. putting down some bricks). Once you are more confident, move onto making a larger one or expanding the existing one further as you get more experience with different materials like brick, stone, etc.

You can make your patio bigger over time instead of trying to do everything at once which could easily cause delays or problems that will not be covered by warranties.

Wrapping Up

If you want to do some home improvements but don’t know where to start, these 10 worst blunders are a great place to begin.

While the majority of projects can be done by DIYers and save money in the long run, it’s important not to cut corners when doing repairs or trying new things like …

Organizing Your Garage Can Be Easy

An organized garage makes a happy homeowner.

There are many reasons why you should organize your garage. Not only does it help you to have more space, but it also makes life easier when it comes to finding something quick when you need it.

The most common reason people organize their garage is because they want more room or want a place for their vehicles. When you have more space in your house, you can move things around easily. And if you have more room in your house, you won’t have to constantly replace things when they get old like you would if you kept them stored in a corner of your garage.

So how can you organize your garage?

Clearing Out

The first thing you need to do before you start organizing your garage is to clear out everything. Remove all the junk that doesn’t need to be in your garage. It might sound counter-intuitive, but this simple process will make things easier.

Start Organizing

Once you’ve gotten rid of everything that you don’t need in your garage, you can now begin to organize your things. The best way to start organize is to place items into different piles.

For example, place tools together, paint, cleaning items, etc. This technique makes it easier for you to find things if you need them and you know they’re in one place. 

Cleaning Up

Now you have sorted out what you no longer need in your life and put them in separate piles. It’s time to clean up your garage. You can use a broom and sweep the floor and vacuum the garage floor to get rid of dust, dirt, and other debris.

It’s important to keep the garage well maintained, so make sure you use a broom that will get the job done. You might also need to invest in some elbow grease and use a power washer to really get all the crumbly ground in dirt out of the garage floor.

Label Everything

When you are done cleaning, it’s time to label with an A, B, C, or D for each item. Now it’s time to take your time moving everything back into your garage. 

But before you do, here are some ideas to increase space.

Ceiling Hooks

Attach hooks in the ceiling and hang your bikes and similar items. on the hooks. This one easy procedure automatically increases the garage storage space.

Garage Storage Shelves

Your next step should be to think about the location of new storage shelves. If you want to utilize large corner shelves, you can line them up against two walls of the garage.

Plastic storage bins are another great option for organizing garage space. You can also locate a wall mount hanging storage unit and bring it up to the ceiling. This will allow you to create more storage space for long term storage.

If you prefer to move the shelving units around in the garage, then you should install wall brackets to hold the shelves up. You can use plywood to support the shelf structure.

Pegboards

Another great option for storing things is using pegboards. Pegboards are an inexpensive storage system that can store many items, such as, gardening tools, cleaning chemicals, pool chemicals, and sports equipment. You can easily install pegboards using the appropriate screws and glue.

Final Words

When you are finished, you will feel accomplished and proud knowing that you took the time to properly organize your messy garage. Good job!

 …

Why You Should Sleep with an Air Purifier

Modern portable air purifier

There are many reasons to use an air purifier in your home. They can improve your health, make you feel more refreshed and help with skin improvement. The air we breathe is filled with many toxins and pollutants. An air purifier will help to remove some of these harmful substances and leave you feeling fresh and clean.

What are the benefits of an air purifier? The simple answer is that air purifiers are necessary to fight indoor air pollution which can cause serious health problems. An air purifier is a machine that filters and purified the air in your home. This air is then used to make your home fresh and clean for everyone to breathe.

What are the benefits of an air purifier when it comes to removing indoor air pollution?

Benefit #1

One of the main benefits is that it is cost effective. You will be able to save thousands of dollars every single year from your energy bill using air purifiers. Air purifiers also use less power than traditional air conditioning systems, which means you can save even more on your electricity bills.

Benefit #2

Another great benefit is that by purifying your air, you will be able to protect your family from breathing in harmful air. Indoor air pollution is known to cause lung illnesses like asthma and other respiratory diseases. If you are using an air purifier, you will not have to worry about this problem anymore.

Also, if you are using an air purifier, you will be able to breathe easy whenever you go out of your home. You won’t have to fear that you will inhale any harmful fumes that may be floating around in your home.

Benefit #3

Air purifiers can also improve your skin. They have the ability to clean the air and remove any particles that may be harming you. Air that is full of pollen and dust is very polluting. This can be especially bad for people who suffer from asthma. Asthma can make it difficult to breathe and can lead to skin inflammation and other problems.

Conclusion

Air purifiers have been proven to reduce dust mites, germs, and other allergens in the air. By using a purifier you will also reduce the number of allergic reactions that you have in your home as well. For people who suffer from asthma, this alone can be an answer to their prayers. By controlling the amount of dust mites in the air and eliminating the allergens that cause asthma, you can sleep better at night and get better treatment from your doctor.

There are tons of other reasons why you should get an air purifier for your home. However, it is highly recommended to research which one is best for you. …

What Are Plantation Shutters and Why Would You Install Them?

Wooden plantation shutters

Plantation shutters aren’t exactly the first thing that comes to mind when looking for contemporary window treatments, although they are certainly a beautiful, classic design characteristic that has both functional and aesthetic advantages.

Shutters provide privacy and shade in the home while also allowing light to flood through to add warmth and depth to a room.

They are an excellent choice for use in a child’s bedroom as they provide a unique look without being overly cutesy.

Because they are typically made of wood, plantation shutters tend to last for years, often being able to withstand decades of daily use before needing to be replaced. 

Plantation Shutters Benefits

Although there are many benefits of plantation shutters, perhaps the most noticeable is their timeless and elegant appeal. That’s why they are used in locations where it is important to maintain a traditional appearance and feel, including examples of regal properties like grand British mansions.

Some of the most common reasons to install these types of shutters are to block out excess sunlight during the day, and to create a warm and inviting environment inside of the home. 

Plantation shutters are also wonderful privacy shutters, as they can be made very dark to keep prying eyes out. These shutters can be placed in many different locations in the house to suit any style or design preference that you may have.

If your home is currently being built, installing these wonderful shutters can help the builder install a professional-looking exterior. Once you locate the proper installers or contractors, you will need to discuss the installation process with them.

For the DIYers

If you feel you have an extra hand or two around to help you install them, then you should do so as long as you follow the installation instructions. Just be sure that you read through all of them carefully and understand everything before installing the shutters. 

You may think that they are too complex to be installed, but once you understand how they work and the proper installation procedures, you will find that they are extremely easy to install. The shutters will last for a lifetime, so you want to be sure that you install them properly.

Conclusion

With all of these wonderful benefits, why would you not install these beautiful shutters in your home? If you have not yet checked them out, you should definitely take the time to look at all of the beautiful styles that are available today.

 …

4 Steps for Power Washing Your Deck

Homeowner pressure washing his deck

One of the best ways to keep your deck looking great and sanitary year round is to use a pressure washer on your deck.

While there are some other things you can do such as sealant or weatherproofing, nothing can compare to the pressure washing benefits of a pressure washer.

If you are like most people, your deck is probably not your top priority when it comes to remodeling or painting. However, if you want a clean, sanitary, and beautiful deck, you should seriously consider using pressure washing to keep your deck looking fabulous year round.

If you are not certain how to use a pressure washer on your deck, here are some basic guidelines that may help you.

Step #1

Pressure-washing your deck is best done in the late spring or early summer when the weather is warm, the leaves have not dried yet and the deck is mostly dry.

Step #2

Check to make sure there are no low branches or other obstacles that can trip you up. If there are low branches, for example, consider lowering the guardrail so you do not scrape the decking or damage it in any way. You will also want to check for nails or other screws that could potentially get in the way of the pressure stream as you are pushing the hose through the decking.

Step #3

When the water has completely saturated the area, take a sponge or brush and scrub the deck thoroughly. You may need to do this several times, especially if there is a lot of grass or debris.

You will want to make sure that there are no hard objects such as rocks or nails left in the water that will be hard to clean later. Now, let the pressure cycle and finish cleaning the area.

Step #4

Finally, if the pressure washer has been working correctly all throughout, you are ready to finish cleaning the deck. Use the same sponge and brush that you used to clean the other areas on the deck and do the same to the decking. Once you have done this, close the valve and allow it to naturally release the pressure. 

Conclusion

Most people are intimidated by the idea of cleaning their own deck, but with so much information online nowadays, there is no reason to worry.

If you use a pressure washer, learn how to use it safely. Know what kind of pressure washer to use for the size of your deck, what kind of pressure washer nozzle you should use, and how to protect your deck from scratches and cracks.

Once you know these things, it will be easy to pressure wash your home deck and keep it looking phenomenal all year long.

With new technology and a little information, pressure washing your deck can now be a fun and easy process that any homeowner can take part in.

 …

Best Way To Clean Your Home Windows

Do you wonder about the best way to clean your home windows?  Well, the answer varies depending on the condition of the windows.

When dealing with the interior of your home, you’ll have different problems than if dealing with the exterior of the house. You have to deal with more dust, mildew, and mold inside your house, because these things tend to thrive in moist and humid conditions.

Exterior windows, however, are much easier to clean because they’re often less vulnerable to the elements.

Exterior Window Cleaning

The best way to clean your exterior windows is to use a high-pressure washer. These high-pressure washers blast water and cleaning chemicals onto the windowpane.

After the water has been sprayed on the windows, it’s important to wipe it up with a clean cloth, so as not to leave streaks or residue. It’s also a good idea to use a scraper on the windows once you’re done spraying to remove any debris that may have stuck to the glass.

Interior Window Cleaning

To clean your home’s interior home windows, use a mild cleaner. You can use a product like Windex to clean the windows with paper towels. This will ensure that no streaks are left behind and they look great throughout the home.

Reasons for Keeping Your Windows Clean

Why you want to clean your windows has a lot to do with keeping your home safe from the elements. In fact, your windows have a much larger impact on the overall appearance of your home than you might think. If they’re dirty, dingy, or missing even the least bit of grime, it can alter the entire appearance of the home.

For example, a house with stained windows will detract from the attractiveness of a residence rather quickly. That’s why it’s very important to keep your windows cleaned to restore their luster.

Secondly, if you want to sell your home, dirty windows will kill your potential for a fast sale. When potential buyers see windows that need cleaning, chances are they won’t invest in your home. 

Finally, once you’ve decided to clean your windows, you might find yourself motivated to take care of other things in your home as well. Cleaning windows can boost the curb appeal of your house and open up spaces in your home.

While that might not seem like a big deal on the surface, windows can work wonders in terms of increasing the overall value of your property. This is why you want to clean your windows regularly; they are an easy way to add a few more dollars to your property.

 …

How to Choose the Right Bathroom Tiles

White Spacious Luxury Bathroom Interior Design

If you are planning to renovate your bathroom, you will have to learn how to choose the right bathroom tiles. These tiles can either make or break your renovation. So, before you renovate your bathroom, you should take adequate time understanding the various types of tiles available and their uses. Tiles vary in their prices and quality. Some tiles may cost you more than others but still you need to look for those that fit your budget.

So, how to choose the right bathroom tiles? You should have an idea about the floor area of each and every tile. This will help you choose the right size of tile. If the floor space is limited, you should go for small-sized tiles. Else, you should choose larger size tiles that can hide any ugly features of your bathroom walls.

Now, let’s come to the different types of tiles available for bathroom renovation. Most commonly used tiles are porcelain tiles, quartz, and limestone tiles. But you can also find glass, brick, and marble tiles. You can choose any tile for your bathroom according to your personal preference. However, if you are not very sure about which file to use, you can consult an expert who will be the best person to guide you about the pros and cons of each tile.

The most important part of tiles is their surface finish. When you buy bathroom tiles for your house, you must look for their polished or honed surfaces. Polished surface tiles have a more elegant look. Whereas honed tiles have a less glossy finish and can look very simple. In addition to these two basic aspects, you can also choose tiles according to their surface patterns like travertine, slate, sandstone, etc.

Also consider the texture of tiles when you are trying to choose them for your bathroom. If you are planning to use ceramic tiles in your bathroom, then choose a tiled with smooth surfaces. On the other hand, if you plan to use travertine tiles in your bathroom, you can try to choose bathroom tiles with rough surfaces.

Also think about the shape of tiles when you are selecting bathroom tiles for your home. There are tiles that come in a square shape and others in rectangular shape. You can easily find rectangle tiles in most home improvement stores. On the other hand, if you want to have a unique looking tile, you can choose travertine tiles for your bathroom.…

The Benefits of Epoxy Flooring

Epoxy flooring is an excellent natural sealer for garage and concrete floors. It is a highly resistant floor covering, perfect for virtually any surface.

Epoxy has many advantages, including its resistance to moisture and other environmental conditions, ease of maintenance, and added beauty to a home or business. However, not every homeowner or business owner knows the benefits of epoxy floor coverings and what makes it an ideal choice for flooring.

However, when choosing epoxy for garage flooring, you’ll need to consider a few factors, such as your needs and budget.

Moisture Resistance

One of the primary benefits of epoxy is its moisture resistance. Epoxy provides a barrier against these elements and keeps the air flowing in your garage.

Because it is a strong floor covering, it can be used on almost any surface imaginable. It is also resistant to moisture, meaning you won’t need to worry about water ruining your epoxy coating. However, this is not the only advantage that epoxy provides.

Durability

Epoxy floors are also extremely durable and can withstand the wear and tear of everyday use. This durability allows your epoxy floors to last for years without the worry of replacing them.

Because epoxy floors are so strong and tough, they are perfect for those with busy work schedules. Not having to replace your floors often saves you time and money.

Beauty

Another advantage of choosing epoxy for your garage floor is the added beauty it provides. Various types of epoxy finishes can easily add style to your flooring.

For example, you can add an antique look using a finish that includes tiny beads, pebbles, and tiles. If you want to add a unique decorative effect to your floor, you can apply a finish that adds a bit of sparkle to your flooring.

Finally, you can even coat your epoxy with a decorative pattern and add some decorative accents, such as rugs, to create a special touch of style in your garage.

Safety

Of course, the most obvious of these advantages is the added safety of using epoxy floors. If you have kids or pets at home or work, you will significantly benefit from the fact that your floors will be more resistant to the harmful effects of moisture.

When it comes to protecting your family and pets from accidents, epoxy floors are the best choice. With the right sealer, you can provide a safe barrier that keeps your floor dry and free of contaminants.

Final Words

There are many benefits to using epoxy floors. Not only do you get the added benefit of a strong barrier from moisture, dirt, and spills, but you can choose a look that enhances the look of your home or business while providing extra safety for you and your loved ones.

If you are looking for a substantial investment in your home and your family’s well-being, consider using epoxy for all your flooring needs.…